A few weeks ago, I went to Tennessee with three of my oldest friends. We spent half the time in Nashville, and half in Eastern Tennessee visiting Dollywood. We had a blast - we ate too much, listened to more country music than I ever have in my life, and seriously considered buying cowboy boots. Nashville is a great town, and I felt like I only scratched the surface of it in the few days we were there. Nonetheless, I thought I'd share my favorite spots for those that might be considering a trip to Music City. Read my recommendations after the jump:
Showing posts with label my life. Show all posts
6.08.2015
3.25.2015
living room progress
I've been working on changing up our living room for the last few months. With the current crazy rental market in the Bay Area it doesn't look like we'll be moving any time soon, so I decided to try to make the best of the space we have and give it a little refresh. It's not quite finished yet, but I thought it might be interesting to share a bit of my process and a peak into the changes I've made so far. Read on to see the progress of our living room:
2.10.2015
i'm baaaaack
Hello friends! Hope you are having a happy 2015 so far. I apologize for the radio silence the last few weeks. Just before the holidays, I herniated a disc in my back, and it hasn't been fun to deal with. Slowly but surely, I'm getting better though, and should be on the mend soon. The only upside was that all the time I spent laid up on the couch inspired me to do a little makeover of our living room. Stay tuned for posts about finding a new couch, rug, and more. Until then, you'll just have to enjoy this adorable injured lamb...
8.31.2014
happy labor day
It's my birthday this weekend, so I'm taking a little hiatus from blogging. I plan to spend the weekend picnicking, eating delicious food, and trying to soak up the last bits of summer. Hope you have a great long weekend- go outside and have some fun!
[photo from Trophy Cupcakes & Parties via Scout]
8.20.2014
organizing bookshelves by color
I recently reorganized my bookshelves by color and I'm in love with how they turned out! I previously had them organized by category, which made my inner librarian happy, but wasn't very visually appealing. Read on for a glimpse of my organizing process, and the final results:
There's really no way to do this without making a big ol' mess. I sorted all my books into stacks on the floor according to the color of their spine. Since my bookcases only have three shelves (which are not adjustable), I had to further divide each color stack into short books and tall books. Once I saw how many books I had in each color, I decided to put all the colorful books in my larger bookcase, and the black and white books in the smaller case.
There are many ways to organize the layout of your rainbow. Because of the heights of my shelves, I decided to do a full spectrum of color on each shelf. This proved to be a challenge, as I had far too many red and blue books. I had to get creative with some sideways stacks to get everything to fit.
Ta da! The colorful bookshelf in all it's rainbow glory!
The black and white (and a little grey and gold) bookshelf. It's quite orderly, but not nearly as fun. Looks like I have to only buy colorful books from now on!
7.07.2014
diy ribbon hanger
I've been working on organizing and decorating our office lately, particularly my desk area. I've been looking for ways to make my desk pretty and inspiring without spending much, so I turned to the craft supplies I already have on hand. I came up with this ribbon hanger as a fun way to put my ribbon collection on display. It's easy, cheap, and a great two-for-one: it livens up the wall with colorful ribbon, and makes it easier to access ribbon for gift wrapping and projects.
This hanger is not hard to make (you're basically just tying some twine to a stick), but I've outlined the steps below for you:
6.26.2014
paper rosette tips
It's no accident that I'm not calling this post a how-to guide. I don't quite feel qualified to give anyone a guide after the terrible time I had making these %*@&#! rosettes. I wouldn't consider myself an extremely crafty person, but I can usually follow directions and get a pretty decent result. That was not the case with these suckers- they are more complicated than they look! I ended up trying out quite a few tutorials, so I thought I'd share what I learned along the way. Perhaps you can avoid some of my mistakes...
I bought most of the paper I used from Paper Source, so I figured their website would be a good place to find a tutorial. Wrong! Using the measurements they gave, I could barely get the two strips of paper to meet. When attached, they formed a sort of cone shape that would not lay flat without tearing. Fail!
Next stop, Martha Stewart. Oh Queen of craftiness, why is your tutorial even less clear than Paper Source's?! Would some photos of the steps kill you?
OK, time to find some DIYers who know what's up. I found several tutorials using the method explained on Catch my Party. It's similar to the Paper Source method, but you attach 3 fans of folded paper together instead of two. This worked a little better. I could actually get something resembling a rosette shape, but had a hard time attaching the fans with a stapler. I ended up with gaps where the fans of paper were attached (in the photo above, the top white rosette was made with this method).
The final method I tried worked the best for me. This tutorial from the Broke-Ass Bride produced the cleanest and best-looking rosettes. One VERY IMPORTANT note: in this guide, you're using two 12" sheets of paper, cutting them both in half, and then glueing the four strips of paper together to make one long 6" x 48" strip. Hopefully your reading comprehension is better than mine, but this wasn't 100% clear to me in the first read-through. I made one using a 6" x 24" strip of paper and ended up with another cone. You can adjust the paper size to make bigger or smaller rosettes, but the length of your paper should always be at least six times the width for this method to work.
A final note on supplies: I used several types of paper with varying results. A medium-weight paper similar to construction paper will work best. I don't recommend using card stock, it is too thick and really a pain to fold. Paper Source's rolls of solid gift wrap are a good weight, and a good value. The fancy fine papers I used really were mighty fine. They were so soft and had a bit of stretch, but beware- they're ridiculously expensive. In retrospect, I probably should have just used scrapbook paper, but I really, really didn't want to go to Michael's...
Have you ever made rosettes? Am I the only one craft-impaired with these?
6.23.2014
graduation party
My good friend Kait graduated from medical school a few weeks ago, and I helped throw a party to celebrate. I partnered with Oakland Bakes to create a festive dessert bar for the occasion.
We chose an olde timey apothecary theme with a color palette of minty hospital green, white and silver as a nod to the medical profession. We used apothecary style jars and vases, and displayed the cookies on quarter-sheet trays to suggest surgical instrument trays. I incorporated the colors into the decor by crafting rosettes and pom poms in the same palette.
Read on for more photos:
3.09.2014
colorful key west
I'm back from Florida! Key West was amazing! I fell in love with all the gorgeous, brightly-colored houses and the lush tropical foliage everywhere. I was totally feeling the tropical pastel color palette- everything was painted sea foam green! We rented bikes from our hotel, (The Eden House- I highly recommend!) which was a great way to get around, except Jon kept almost losing me because I was stopping every 50 feet to take photos. What I wouldn't give for a wrap-around porch!
Read on for more photos of my favorite colorful houses and their clever details:
2.24.2014
monday links
Happy Monday! How's your week looking? I'm heading to Florida at the end of this week. We'll be in Miami for a few days and then we're driving down to Key West. I'm excited- I've never been to the Keys! Any suggestions on what to see and do? So far I've got two things on the agenda: eat lots of Key Lime Pie and try to see a Manatee. Oh, and singing Kokomo, which I'm sure will be stuck in my head the whole time.
While researching Key West, I came across They Draw and Travel, which features fun maps illustrated by artists from around the world. I love the illustration style of this Key West map by Nate Padavick.
Are you sad the Olympics are officially over? I didn't watch them as much as I would have liked to. I definitely would have watched more events if David Attenborough had narrated the whole thing, like in this curling video. I wish he could narrate everything, all the time.
If you need a laugh this morning, look no further than Texts from Dog. I think this one might be my favorite. Or maybe this one. Aah, can't stop. This one.
[Top image via Tip Trips Florida, Key West map by Nate Padavick via They Draw and Travel, Olympics image via 2014-Olympic]
Labels:
animals,
hilarious,
monday links,
my life,
travel
12.23.2013
christmas tree
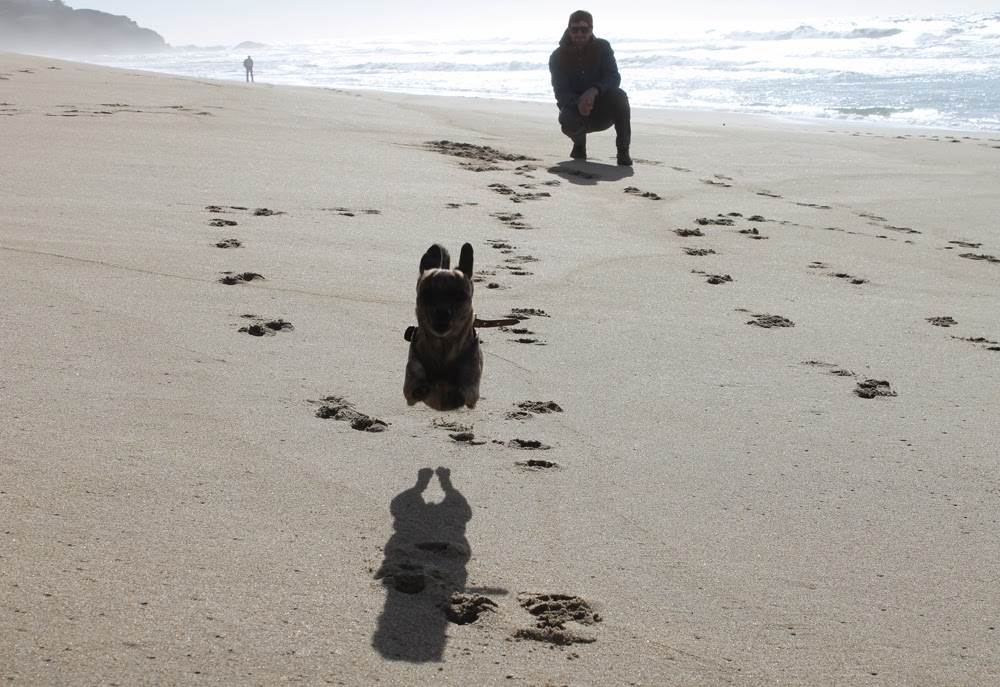
We went down to Half Moon Bay a couple weeks ago to get our Christmas tree. We started this tradition last year, when we cut down our own tree for the first time. It's a nice excuse to go down to the coast and let a certain little dog run on the beach...
...and take flight!
10.14.2013
house full of plants
Inspired by my friend Michael's lovely collection of houseplants, I've been trying to add more plants to my home. I love the fresh pop of green they add to a room, there's something so cheerful about a little potted plant.
Our current apartment doesn't get a ton of natural light, so its been a bit of a challenge to find plants that will survive in our mostly indirect light conditions. Click below for tips and photos of the plants I have been able to keep alive, as well as the ones that didn't make it...
9.23.2013
bathroom makeover
Like most buildings that were built a century ago, our apartment has many flaws and quirky features. Many of them are charming and give the place character. When it comes to bathrooms, however, old quirks are often more gross than charming. Old tile usually just looks, well, old. If I had my way, I'd have a beautifully restored old house with a re-tiled bathroom (and while I'm dreaming, let's update the tile in the kitchen too). Unfortunately, as we're still renting, gutting the bathroom wasn't an option for this apartment. In the past, I haven't put much effort into fixing up rental bathrooms, but this one needed some serious help.
9.17.2013
second wedding anniversary
This week marks my second wedding anniversary. It's hard to believe that its already been two years! Sometimes it feels like happened just last week and other days it feels like we've been married forever (though in a way we have been- we did date for seven years before tying the knot!). I thought I'd share a few photos and some details on the awesome vendors we worked with:
9.02.2013
birthday hooky
Its my birthday this weekend, so I'm playing hooky from blogging. Lest you not know what to do with your Monday without me, I thought I'd leave you with a few links to amuse yourselves with:
Pigeon street style - who knew?!
Video for the song Royals by Lorde. Warning: I haven't been able to get this song out of my head since I heard it a week ago.
And don't forget, Labor Day means sales! sales! sales!
Need to buy paint? Home decor? New jeans? Cute dresses? Shoes in size 11? (oh wait, maybe that's just me...)
[Pigeon photo by haseebansar via Buzzfeed]
Subscribe to:
Posts (Atom)