
For a new twist on ombre table linens, I thought it would be pretty if the ombre effect ran the full length of the table, with the napkins getting progressively darker from one end to the other. To achieve this look, I dyed a set of napkins in a spectrum of shades of pink.

I started with a set of twelve white napkins. Its important to wash them before dyeing to remove any finishes that could interfere with the absorption of the dyes.

I used two colors of Rit dye. I decided to do six different shades of pink to make up my gradient (with two napkins in each shade). The four lightest shades were achieved with Petal Pink, and then I added a little Fuchsia for the two darkest shades. If I was doing this again, I would use a liquid dye, as it was difficult to get the powder to fully dissolve.

For this project, you will need:
- white cotton napkins (probably at least six to create this ombre effect)
- powder or liquid fabric dye
- tarp or garbage bags
- large plastic or metal bucket
- small container (a 2-cup glass measuring cup works well)
- salt (as directed by dye instructions)
- rubber gloves
- large metal spoon and tongs
- small pieces of scrap fabric for testing dye strength
Start by covering your work surface with a tarp. I would recommend doing this project outside if possible so you don't end up dyeing your table or floor. Next you will need a large amount of hot water. I heated two large pots of water on the stove to 140 F. Fill your bucket with at least 8 liters of hot water and the salt (I used 1 cup for the Rit dye). If using powder dye, be sure to dissolve it in a measuring cup or small container before pouring it into the bucket. At first, I thought I could skip this step and ended up with spots of undissolved dye on my napkins.

My original plan was to start with a 3 liters of water and half a packet of dye to create one of the lighter shades of pink. I could then increase the amount of dye and the time in the dye bath in increments to create the darker shades. Very scientific, right?
Not so much. This worked OK with the small piece of test fabric, but once I dipped two napkins in the dye, it quickly became obvious that it was not enough water. The directions said to leave the fabric in the dye for at least 10 minutes, but the napkins were already a deep shade of pink after only one minute. I filled the bucket to the 8 liter mark and tried again.
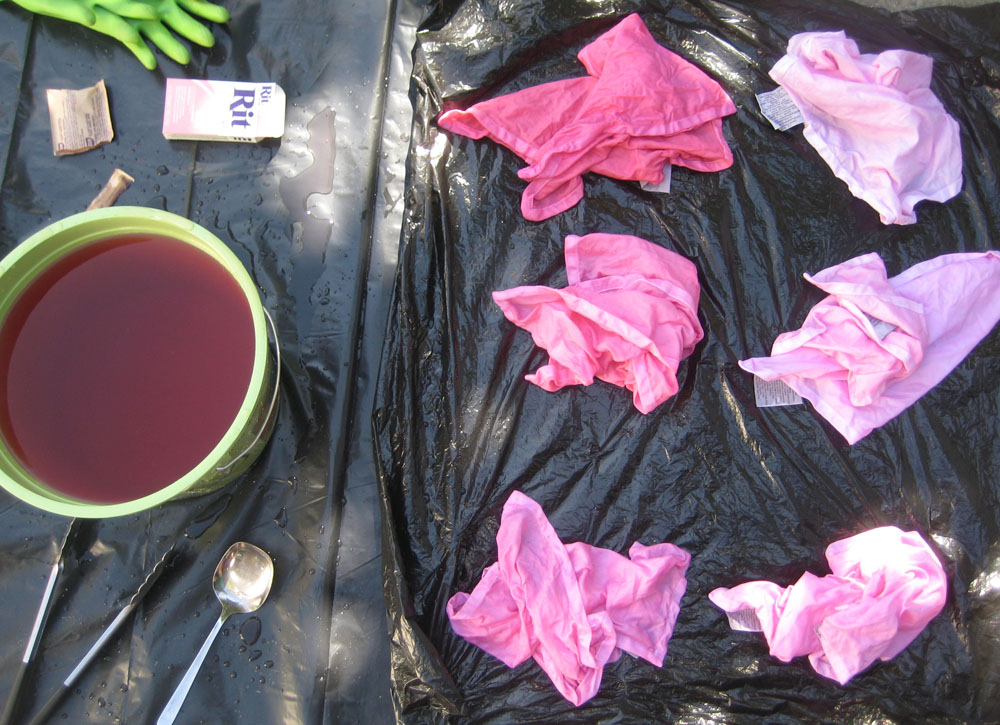
In the end, it ended up being more of a trial-and-error process than a scientific one. Eight liters of water gave me enough room to dye two napkins at a time, but a larger bucket may have made things easier. I started with half a packet of Petal Pink for the lighter shades. For the very lightest pink, I dipped them in the dye, swirled around once, and then pulled them out immediately. The light pinks were probably only in the dye bath for 30 seconds or less. I added the rest of the Petal Pink packet for the mid-range pinks and left them in for 3-5 minutes. For the two darkest shades, I added about a tablespoon of the Fuchsia dye and increased the time to 8-10 minutes. As I dyed each batch, I lined them up so I could check each new color against the ones I'd already dyed. Keep in mind that the color will fade quite a bit once you rinse and wash them, so go darker than you think you want.

A few tips for dyeing:
- Wet fabric in water before dipping in dye bath
- Use tongs to keep fabric moving the entire time it is in the dye bath. Streaks or spots of dye can happen if you let the fabric just sit there
- Check color progress frequently as it does not take long to dye such a small amount of fabric
- Wear old clothes and gloves (unless you want pink hands)
Once you have all your napkins dyed, rinse them in the sink under cool water until it runs clear. Then launder in warm water with detergent.

Now it's time to set the table!
[Top and bottom photos of table by Michael Pieracci]
No comments:
Post a Comment